|
|
|
Last Updated: Oct 29th, 2004 - 03:55:13 |
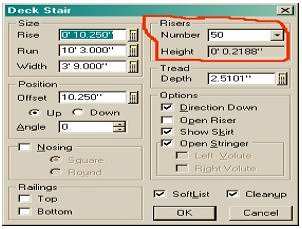
NOTE: It is important to check local building codes as to the pitch of the ramp, size (width), size and shape of landings, and etc. It is easy to put on any kind of ramp you want. For this illustration I used a 6x6 deck. If you want a 3d, it does not matter which kind of stairs are used (deck or interior). 1) Draw you’re stairs and edit them to the right width and length. NOTE: length is determined by pitch. Here in PA a maximum pitch of 1” rise per 12” run is allowed. Since my deck was only 10.25” off the ground (width of joists and decking) my run was to be 10’3”. To get it to look smooth you need a lot of little treads. Softplan has a max # of risers that is allowed. For the straight deck stairs it is 50. NOTE: this principle is much like a circle, the more short straight lines used to draw it the rounder it looks. Therefore, you want the most number of treads in each application.
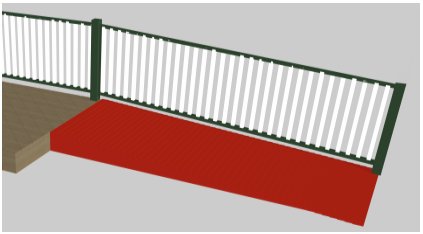
2) At this time you can add railings. Remember, version 11 of sp puts the railings inside the stairs, so you’re width will need to be big enough to allow room for them AND the required ramp width. For the look of a ramp you need to check the show skirt box and the open stringer box (if no rail is required but instead just a bumper so wheels don’t go over the edge you can leave open stringer unchecked). Edit the railing like any normal stair, and try a 3d.
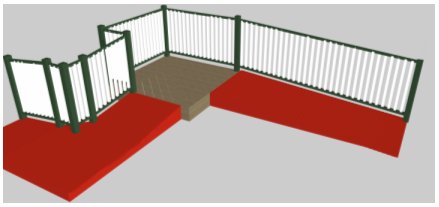
You will with the right angle and the right lighting be able to see that it is actually steps, not a smooth ramp. But, for the most part it simply appears as if there is a small gap between the decking boards used for the ramp. This look can be hidden even more by making the risers and treads the same color. Since many times we are not able to do one straight run you may need a landing. Using the same process for any style stair is possible (straight, angle, or curved)
This picture shows a 90-degree angle used. You can tell that the landing flattens out, as it is only 1 tread. If you want the landing to appear sloped (if allowed by code) simply raise the total number of treads in the stair. For angled stairs SP stops at a total of 50 treads, but only allows 15 on top and bottom portions. Elevations or sections can be created from this same process. The only fallback is that this method will not accurately portray the material list since it is considered a stair, not lumber.
© Copyright 2004 by SPLASH
Top of Page
|
|
|
|