|
From
SPLASH
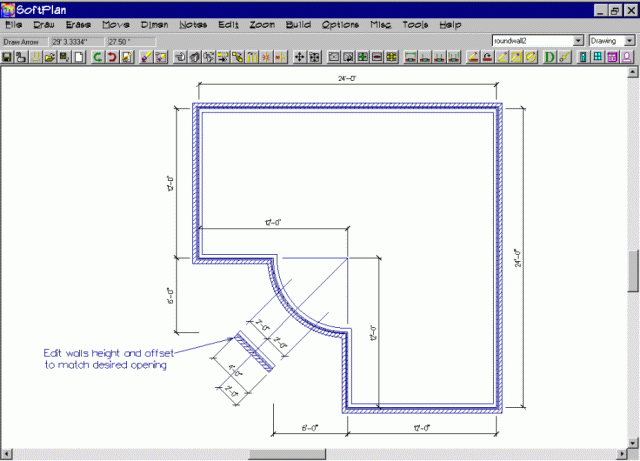
Openings If your design has exterior walls that are curved, chances are you will need some openings in it. Here we will be doing just that, and you can use these same techniques in your designs.
Step 1: First thing to do is find the center of the curved wall sectionĺs radius. There are many different ways to do this. Here I have used lines that have been moved into place by editing their dimensions. From this centerpoint draw a radius that will be the center of the opening. Using parallel lines draw in a representation of the opening sides.
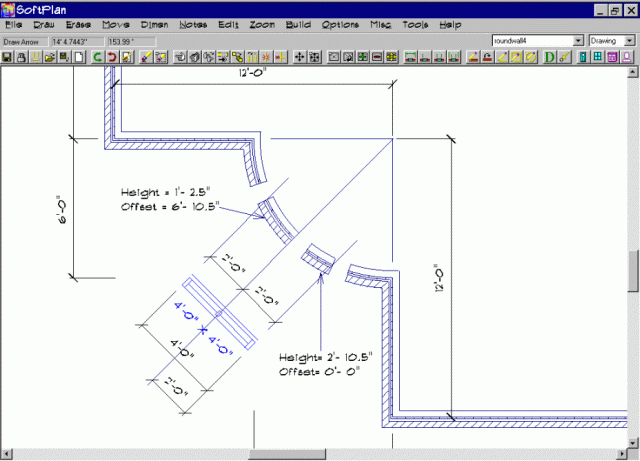
Step 2: Now lets go ahead and build a wall for the window to fit in. Since we cannot put the window in the curved section directly we are going to put it in a straight section and shift it all together. Using the references in step 1, build a wall the width of the opening and align. Here I adjusted my centerline out and dimensioned from there. At this point we want to edit the straight section of wall to the height and offset of the desired opening. Here we are using a 4ĺ-0"x 4ĺ-0" window. Note the straight wall width , height and offset matches our window. To determine the straight wallĺs offset start with the round wallĺs height, 8ĺ-1". Subtract the straight wall height, minus 4ĺ equals 4ĺ-1". Subtract the windows offset, 1ĺ-2Ż". This gives our wall an offset of 2ĺ-10.5". Now our straight wall is the same size and offset as our window.
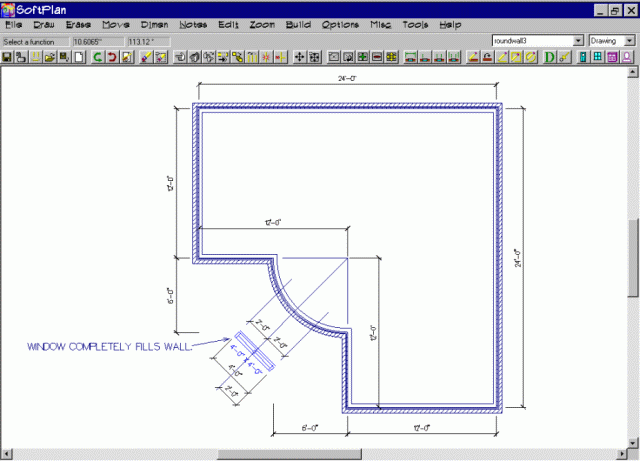
Step 3: Lets put a window in the straight wall now. Place the window as you normally would but draw it in a bit shorter than the straight wall. When the window is set use the edit function to set the windowĺs options. Edit the dimensions ( 4ĺx 4ĺ here), set the windows offset to 0, (this will hold the window to the top of the straight wall). Be sure to check the centering option to set the window to center. Also go into the windows options and set the header size to 0. This will fill our straight wall section with a window.
Step 4: So far so good. Next we have to modify the round wall to accept our straight wall/window section. What we do here is break the round wall into 4 sections. One section will end-up on each side of our window and another section above and below our window. Using the break tool, divide the round wall into 4 sections. Now we will edit two of the round wall sections height and offset to fit above and below our straight wall/window section. Be sure to uncheck cleanup on all round walls.
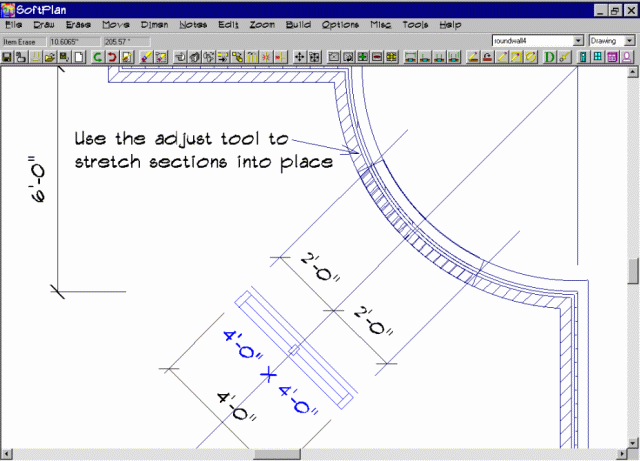
Step 5: We are almost there. The next thing we will do is adjust the round wall sections into their positions. It is important to remember NOT to use the move tool here as it will throw the curved sections out of alignment with each other. Simply use the adjust tool to stretch the curved wall ends into their places. You may need to zoom in some for accuracy. Adjust to align with your reference lines from step 1. The two sections that were edited for height and width fill the space between references and the full height sections fill the sides.
Step 6: All we have to do now is move our straight wall/window section into place and we will be finished. Select the move tool and then locate item>wall. Just drag it on over so itĺs in place.
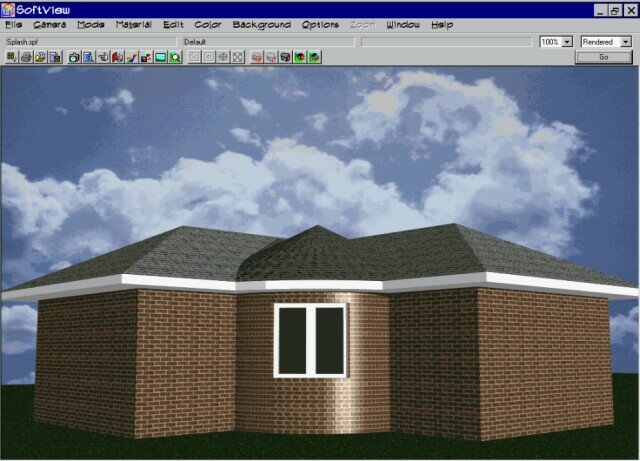
Final look: Now just add your roof and render. If all went well you should have something like this.
© Copyright 2004 by SPLASH http://www.softplansplash.org |