|
From
SPLASH
Misc. Articles Here is a method for creating a barrel vault in SoftPlan. This method uses a custom wall and a custom dashed arch in order to create the rounded ceiling.
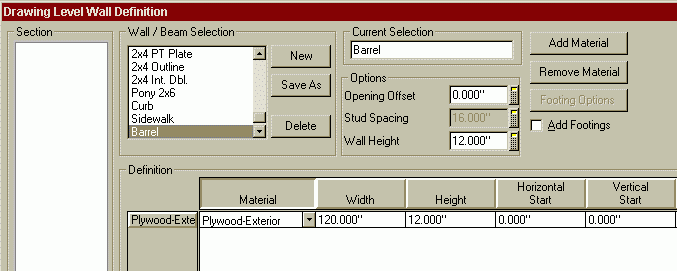
Once you have determined the size of the area to cover you will then need to create a custom wall that will be used for the ceiling. Name this wall "Barrel". This wall will consist of just one material. I used plywood for the material since plywood was not used anywhere else in the room. This allows you to set the texture for the ceiling separately in renderings. Set the width to equal the length of the room, in this case 10'. You can set a height now or set it later in your drawing. It doesn't matter.
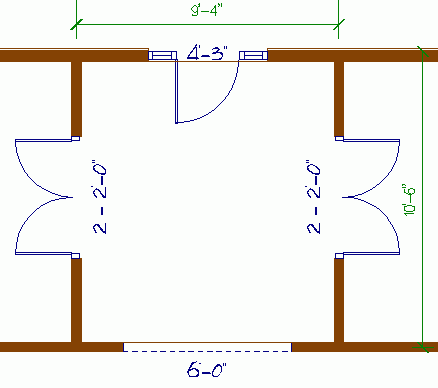
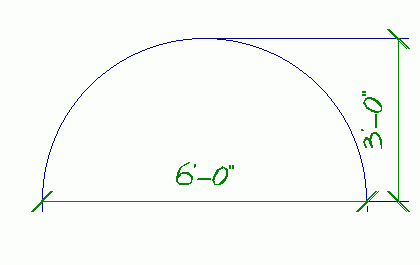
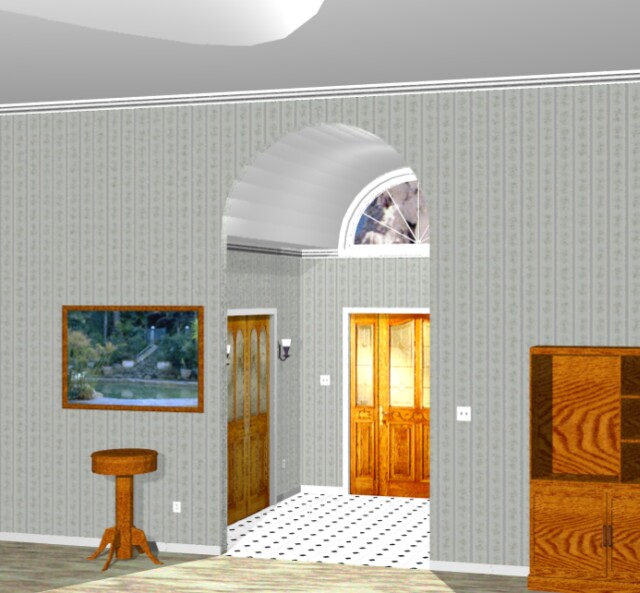
Step 2: Place your custom Barrel wall. Using the wall tool, select the custom Barrel wall and draw a wall going from left to right in the hallway. Since the wall was defined as 10' wide it will fill the length of the hallway. Make any necessary adjustments to center the wall over the hallway and adjust the length to fill the width of the hallway. At this point the hallway should still look just as it does above but there is a wall that you cannot see that covers the entire entry hall. Set the offset of the barrel wall to match the height of the walls in the hallway. For example, if your hall walls are 9' tall then you would give the barrel wall an offset up of 9'. This places the bottom of the Barrel wall even with the tops of the hall walls. Give the Barrel wall a thickness. I used 6'. This is necessary to give the wall enough depth to accommodate the barrel vault. Step 3: Create a custom Dashed Arch. The actual barrel is created by using a Dashed Arch. First determine how you want the barrel to look. Using arc, draw a profile of the barrel vault in a blank area of the drawing. We will make the barrel 6' wide with a 3' radius.
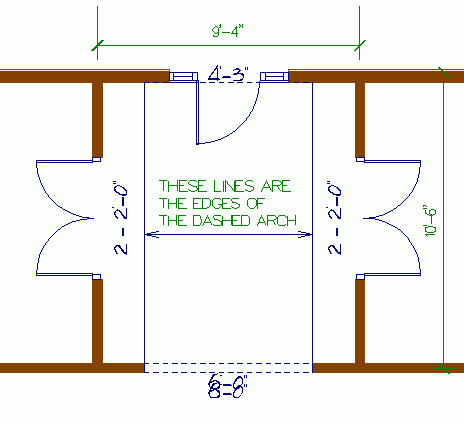
Next create a custom opening by selecting File-->Library-->Opening-->Add Item. Draw a box around the arc. Select the Dashed Arch library and name the new opening "6' Barrel". Now select Draw-->Opening--Dashed Arch and select the 6' Barrel. Click about 1' from each of the side walls in the hallway and then click one more time toward the bottom of the screen. Edit the Dashed Arc and give it a width of 6', height 3', and offset 0". Check Center and select Ok. Your drawing should look like this.
This method can also be used to create a barrel vault with a roof over it, such as in a porch. Since the barrel is created from a wall, you can use Fit Wall to Roof to make the barrel wall completely fill the area below a roof.
© Copyright 2004 by SPLASH http://www.softplansplash.org |